Thursday, 17 September 2020

Thank you, John Venn!!

Hello!

Understanding the differences and similarities between physical and political maps can be slightly challenging for seven and half year olds. 

To simplify it, I decided to use a Venn diagram in my Social Studies class.

Before doing this activity, students should be familiarized with what are physical and political maps. 

Start with the differences since they are easier to identify. Have both the maps displayed and ask your class to brainstorm some of the differences between them. Write down on the board as they discuss. 

Next, move on to talking about the similarities. Have them written in the center on the board. 

Something like this:

Once the discussion is over, draw circles in a way that the similarities are in the overlapping part of the two circles and the differences  on the either sides.

Encourage your class to draw their own Venn diagrams and they could even illustrate, if they wish to. 

For example:

Google search image

Some other subjects/topics where Venn diagrams have helped me make learning fun are:

  • Social Studies - Understanding the similarities and differences between maps and globes, latitudes and longitudes, comparing festivals, religions and so on. 
  • Language Arts - a comic strip and a short story, poems and stories, singular and plural (the nouns which do not change can be in the centre; like - deer, moose, sheep)
  • Science - plants and animals, stars and planets 

Although a Math concept, but Venn diagrams have proved to be very useful across subjects and concepts. I often try to integrate them in my class. I hope you like the idea and try them out.

Please feel free to suggest more concepts where I could apply Venn diagrams in my classroom.


Sunday, 30 August 2020

Let's go on a Treasure Hunt!

Ahoy!

Would you like to go on a TREASURE HUNT with your class? First, let's begin by making a Treasure Map!

I did this activity with my grade 02 students while we were learning about Maps and Directions as part of Social Studies. It surely made my class exciting and fun filled.


You will need:
  • an A4 sheet (you could also use a brown paper bag to make the map look more realistic)
  • a pencil
  • a ball-point pen
  • paints
  • a medium paint brush
  • felt pens
Let's begin!
Ask the students to draw an outline of their treasure map using a pencil. They could start by deciding the spot for hiding their treasure and drawing the route to reach the point. 
A compass rose plays an important role hence that too should be shown clearly. Then, ask them to add a few more features like - mountains, trees, sharks in the water, pirate ships, snakes and so on. 


Now, ask them to trace over the pencil mark with the ball-point pen. This will ensure that the drawing is clearly visible while painting the map. A ball-point pen is important as it will prevent the ink from smudging.


It's time to add some colours!
Kids can use brown for the land area and blue for water. Remind them to use very little paint and enough water as making the map too dark could hide the details on the map. Once the paint is dry, trace over the map using felt pens. Students can highlight the treasure hiding spot by drawing a red cross.
We have now reached the most interesting part of this activity. Are you ready?

Tear the edges of the map with your hands. Be very careful while doing that.
Now crush it. Yes, you read it right! Crush your map to make a paper ball
Finally, open it and you are ready to go on a TREASURE HUNT with you class!

I hope you found the activity interesting. Looking forward for comments.

Wednesday, 26 August 2020

Beyond Our Imagination!

Hello!

Even sky is not the limit for the little ones and their imagination!

Through this post I want to share one such experience of mine with my batch of 7.5 year olds.

While learning about stars and constellations, we did an art activity as an integration with the topic. I was taken by surprise to see their creativity.  

This activity requires very simple preparation and it's easy to do.

You could give a name to the activity. I called it : Finding My Constellation


You will need:
      
  • Black kg card sheet/chart paper
  • Silver acrylic paint 
  • Paint brushes 
  • Some water
  • Pencil


Begin by diluting the paint with very little water. Add water only if it is required. The consistency should be on the thicker side. Once it's ready ask the kids to dip their paint brush and sprinkle on the black kg card. The silver dots will look like tiny stars.

Now comes the interesting part!

After the paint is dry, ask the kids to look at the stars carefully and try to find their own constellation. Once they have visualised, ask them to use a pencil to connect the dots/stars and draw them.
 
Believe me, you will be wonder struck by looking at their creation.


To highlight the constellation, you could ask the kids to make the dots/stars a little thicker. Finally, ask them to write a line or two describing their constellation and giving a name to it. 
They will simply love doing that!


Have a sharing time during which students show their constellation to everyone and talk about it. 


While my class was busy finding their own constellations, I found mine too! I called it The Shiny Seahorse! :)

Here are a few pictures of constellations created by my grade 02 students.


Tuesday, 11 August 2020

Think Thick!

Hello!

You may find this post really helpful if you take Reading/Reading Comprehension in your classes. Well, it is actually applicable to all teachers and across subjects but through reading we can make the most out of it.

Asking questions not just makes our class interactive but also helps our children think. Reasoning skills play an important role in our teaching world, not just for students but also for us teachers.  

Let's see how we can help children think and reason better. One of the ways is by asking them to answer and make THIN and THICK QUESTIONS.

Beginning with the THIN QUESTIONS..

Examples of thin questions:
  • How many?
  • Who?
  • What?
  • Where?
  • When?
Answers to THIN QUESTIONS can be found right in the text. They are:
  • Easier to answer
  • Yes or No Questions
  • Usually only one answer
While reading story books or any text encourage children to find answers to such questions and also make THIN questions. Play a game within your group where kids make their own questions and everybody takes turns to answer. 

Examples of thick questions:
  • Why?
  • How come?
  • What if..?
  • How did?
  • What does the author mean?
  • What would happen?
  • What might..?
  • I wonder...?
Answers to THICK QUESTIONS cannot be found right in the text. Kids need to put on their THINKING CAPS!!
    Thinking cap
  • Many answers to same question
  • Need to use evidence from the text
  • Use background knowledge
  • Difficult to find directly in the text


Play the same game as mentioned above for helping kids to answer and make THICK questions. 


Thick vs thin questions


By doing an activity on 'Thick and Thin Questions', kids not just learn how to find clues for the answers but they also learn to make questions. Thinking and reasoning skills are further deepened.

I hope you find this activity useful. Keep reading for further ideas!! :)

Happy to receive comments!! 

Wednesday, 24 June 2020

Say NO to Water Pollution


Hello!

Water pollution is a serious concern in our world and we all know the consequences. 

When discussed as a topic in class with 7 year olds, I encourage them to share their knowledge or experiences with everybody. It not just allows them to speak their minds out loud but also creates awareness among them. 

We actually did a 'water polluting' activity in class to watch and understand how water changes once polluted and what could happen if all the water on our planet is polluted!

I kept a tub of water and a few other things like - wrappers, banana peel, straws, oil, rocks, some mud, that could be used to pollute the water.

I called the kids closer to where the water was kept and asked them to dump all the other things into the water. At first, they looked at me like I was out of mind but then they too wanted to understand what actually happens if water is polluted. 

The wrappers and straws started floating on the surface and they discussed and wondered that how difficult it must be for water animals to come to the surface and breathe. Sometimes these wrappers look like some sea creatures and they are swallowed by other big animals. Also, how fishing nets get entangled around the necks of many sea animals and results in their death.

The rocks and some mud changed the colour of the water, leaving the water dirty. The kids made a connection between how they like to take a shower with clean water, keep their home clean and so, sea creatures too would want clean water for themselves. Students also related to immersion of idols in India and it's impact on our seas and rivers.
Finally, when I asked them to pour some oil in that water they were shocked to see what happened. The oil was floating on the water surface and we could not see the water anymore.

The discussions were never ending. It was enlightening to see students participate actively in discussions. They felt sympathetic for the sea creatures and realised the amount of damage that is done to our planet Earth because of human actions. 

The activity also helped the students think about ways to protect water from getting polluted and what could be their roles in order to stop people from polluting the water. 

Kids understand their responsibilities more than we think they do. The session left us thinking the whole day about our actions and ignited a sense of duty towards saving water and the life in water.

Tuesday, 23 June 2020

Eat Healthy, Learn Plenty!!

Hello!

When introducing types of teeth, I ensure to have some eating activity in class. This not just activates young taste buds but also makes the whole session enjoyable.

My focus for the activity remains on:
  • discussing new words or actions/verbs involved while using our teeth to eat (for example - biting, chewing, tearing, grinding, etc).
  • the position at which the food was place first inside the mouth (front, side, back of the mouth).
  • introducing the names of different types of teeth (incisors, canines, pre molars, molars).
The items needed for the activity are:


  1. sliced carrots  
  2. sliced cucumbers
  3. coconut slices
  4. cake slices
  5. sour punk (in little amounts)

The quantity of each depends on the strength of your class. Now, the idea is to have all the 5 items cut/sliced on a plate ready before the class. So, you might have to prepare a little in advance. Everybody should be able to eat each food item and make a note of the action involved and the position or teeth used to eat that particular food item.

Prepare a worksheet or a recording sheet for the same. Something like this:

Food item

Position

(front, side, back)

Action

(bite, chew, grind, tear)

carrot


cucumber


cake


coconut


sour punk


Before beginning the activity, you could brainstorm a few vocabulary by asking them how they eat their food and what actions they do to make the food smaller in their mouth.

As they eat one at a time ask the students to observe which part of the teeth did they use to eat and what action did they do. It's important that they record in the sheet at that moment and then move on to eating the next item.   

The response sheet may look like this:

Food item

Position

(front, side, back)

Action

(bite, chew, grind, tear)

carrot

side 

bite 

cucumber

front 

 bite

cake

 front

chew 

coconut

back 

grind 

sour punk

side 

tear


The answers may vary and all the answers are okay. The activity is more about the experiences of students and hence there are no wrong answers.

Once the activity is over, you could draw their attention to the different types of teeth. The front as incisors, sides as canines and the ones at the back as pre molars and molars. Gradually their functions and structure could also be discussed.

Overall, I really enjoy doing this activity in class as it makes it very simple for the kids to understand the different types of teeth and at the same time we get to eat in class before lunch time!! 😋

Monday, 25 May 2020

Partner Hunt!

Hello!

This is a great icebreaker for introducing many grammar topics like masculine-feminine, singular-plural, synonyms-antonyms and so on. 

It's called Partner Hunt! It's fun and a lot of learning happens at the same time. I used this game for introducing Nouns - gender. 

The instructions are simple - look for your partner, find a spot and sit with your partner. 

If you want this activity to be less noisy then you could challenge your kids to look for their partners by walking towards each other and whispering the nouns mentioned in their slips of paper.

We were 5 teachers so it was easier to organise and conduct the game. If you are the only teacher in class then you may have to prepare a little in advance. Although, I feel, if teachers become a part of this activity then, a lot of variation is possible and you also get a lot of help from them.

Planning:
  • Have slips of papers with feminine and masculine nouns like: uncle - aunt, lion - lioness, father - mother, etc, each written on an individual slip of paper.
  • Make sure each set is complete otherwise a child may end up with no partner at the end of the game.  
  • Fold them and keep them ready. 


      How to play:
  • Have the nouns in a bowl
  • Pass the bowl around and ask the students to pick up only one slip of paper each
  • Once everybody has a slip ask them to walk around the class and look for their partners
  • As soon as they find their partners they must find a place and sit together 


Once everybody has a partner ask them to call out the nouns from their slips. As they call out make a list on the board having the set of nouns (masculine-feminine) written together. You could also have them write down a few of the nouns in their notebooks towards the end of the class. 

I personally like this activity as kids have a lot of fun while hunting for their partners and it requires very simple preparation.

Enjoy!

P.S. If you are playing the game say with Std. 03 kids then have nouns which they are familiar with from previous classes. This will keep them engaged and they will enjoy the activity even more. Later, you could build up from there and introduce newer nouns as per the class level. 

Monday, 18 May 2020

Baking Fractions!

Hello!

This activity is my personal favourite as we don't just learn about fractions as equal parts of a whole but we also get to eat them!!

This is a follow-up activity on the topic and kids should be familiar with simple vocabulary like whole, halves and quarters. 

You could also take this opportunity to revisit 'Time Words' while talking about the steps for baking a pizza. 

You will need:
  • pizza base (preferably wheat base)
  • pizza sauce
  • veggies (I used onions, bell peppers, tomatoes and corn)
  • lots and lots of cheese
  • oregano seasoning (optional)
Set up stations for the activity and divide your class into teams/groups. Have a teacher at each station.

Station 1 - First, the kids will come and pick up a pizza base (the teacher should remind them that the pizza base is a whole)
They will also spread some sauce on it. 

Station 2 - Next, the team will move to station 2 to place veggies on the pizza.

Station 3 - Then, the group will spread some cheese and add oregano seasoning.

Station 4 - After that, the teams will take the prepared pizza to the kitchen to be baked in the oven with the help of their teacher. 

While the baking happens, you could play a quick quiz to recap the lesson. You could ask questions like:
1. How many halves make a whole?
2. How many quarters make a whole?
3. How many quarters make a half?
4. If I eat 2 out of 4 slices of pizza then, what fraction of the pizza did I eat?
5. If you ate 1 out of 4 slices then, what fraction of pizza you did not eat?

Finally, once we smell some freshly melted cheese we can take out the pizza and show it to the kids. 

This is the most important part of the activity as the fractions will appear now! 

With the help of a pizza cutter, divide the pizza into two equal halves (showing the two halves to the class) and then further divide the halves into quarters(again, show the 4 equal parts) 

Now comes the most awaited part - Eating the Fractions!


Ready to eat??

Students will be super thrilled to eat the pizza. This activity will make the unit most interesting and memorable not just for kids but also for you. At last, ask the kids to write and draw the fraction of pizza they ate. 

P.S. If you do not have access to kitchen in school then, the same activity can be done using paper plates (as pizza base) and colourful chips of paper (as toppings). 


Monday, 27 April 2020

Shifting Shadows!!


Hello!

I find this activity very useful when teaching about varied shadow lengths and their positions during different times of the day.
What I like best about this activity is that I can integrate Art skills with Science (Light and Shadow) and Math (Measurement and Time).

You will need:
  • some tin-foil sheet
  • 1/4th of a KG card sheet (any colour)
  • glue
  • colour pencils/felt pens
  • a ruler
  • a pair of scissors
You could begin by demonstrating the steps to make a tin foil puppet. Once it's made, stick it on the KG card sheet using some glue.

I find this YouTube video very useful for making the tin-foil figure. It demonstrates the steps very clearly.

https://youtu.be/eDOOqdm_9jc

Ask your class to make a tin-foil figure for themselves. You could do it with them in class or play the above video in your class and ask them to follow it step by step.

It is important that they stick their puppets in the centre of the KG card sheet. This will ensure they have enough space to outline the shadows.

Now, take them to the playground or any open area at three different times of the day: morning, noon and later in the afternoon.

Ask them to observe the shadows carefully and outline them using 3 different colour pencils, They should then measure the shadows using a ruler and write the measurements and time beside the respective outlines.

Students will see that the shadows formed due to sunlight have different lengths and positions.

I too did the activity at home. I hope you find the images useful.


Shadow in the morning:

Time : 9:30 am. 
Length : 12 cm
Position of the shadow: in front of the figure


Shadow at noon:

Time : 12:30 pm. 
Length : 5.5 cm
Position of the shadow: under the figure


Shadow in the evening:

Time : 4:00 pm. 
Length : 14 cm
Position of the shadow: behind the figure


To sum up:

The shadows are longer in the morning and evening; whereas, they are shortest at noon as the sun is overhead. 


Friday, 10 April 2020

Connecting Texts

Hello!

Kids comprehend better when they make connections with the books/texts they read.
By comprehension I mean, 'making meaning' of texts. A purpose for engaging with the text becomes necessary to be able to enjoy it.

Building connections is a strategy that can help kids comprehend and relate with the text better. 
There are mainly three types of connections that a child can make:
  • Text-to-Self - connecting the text to yourself and your experiences
  • Text-to Text - connecting the text with another book that you might have read
  • Text-to-World - connecting the text with events in real-world

cuyhelji / Text to self connectionText-to-self connections are personal connections that a reader makes between a piece of reading material and the reader’s own experiences or life. 

Example:  "This story reminds me of the time when I visited my grandmother's house and we cooked biryani together."


Making Connections Anchor Charts with Question Stems by Mary ...
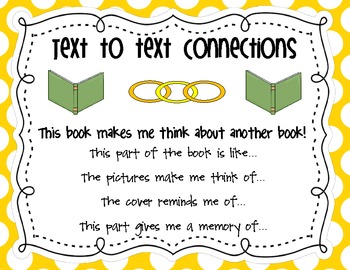
Sometimes while reading, students make connections with other similar texts/stories/books that they have read. These are text-to-text connections. 

Example: "The cover of this book reminds me of  the book, 'Granny Torelli Makes Soup', which I read last year in grade 04."


Text to World Connection- Animal Report ExtensionText-to-world connections are larger connections that goes far beyond our personal experiences. 
Students here make connections with the events happening in the world which they may have come across through television, newspapers, movies, etc.

Example: "I was watching a program on T.V. last night, it talked about similar events as in this article."

To effectively used this strategy, demonstrate or model for students how to make connections. 

The simplest is text-to-self, so we can start with that. You could read a book to your kids and use phrases like, 'this reminds me of a time.....' or 'this reminds me of...' to make connections between the book and your life. In a similar way ask the kids to build such connections and share with all.
Once they are familiar with making connections with self, move on with the other two types.  

I am sharing a few connecting statements that you could use as prompts for class discussions.

This part reminds me of....

I felt like...(character) when I....

If that happened to me I would....

This book reminds me of...(another text) because....

I can relate to...(part of text) because one time....

Something similar happened to me when....


You could also use the following questions to help kids connect.

                                                     Text-to-self:
What does this remind me of?
How is this different from what happened with me?
Has something like this ever happened to me?
How did I feel?

                                                     Text-to-text:

Which other books of the same author have I read?
How is this text similar to other texts I’ve read?
How is this different from other books I’ve read?
Have I read about something like this before?

                                                     Text-to-world:

What does this remind me of in the real world?
How is this text similar to things that happen in the real world?
How is this different from things that happen in the real world?
How did that part relate to the world around me? 
Making Connections - 2017 Summer Program - YouTube

Keep Reading, Keep Connecting!!